Saturday, April 14, 2007

Final couple of bags

Or rather until I can indulge again (i.e. after the metal thread project is done). I should have posted them over Easter as the final part of my week of bags but I didn't get one small piece finished in time and then mid week was migraine influenced. Anyway, I will quit my whingeing and present to you my, dah, dah, dahhhhhh!

Laptop slicker.

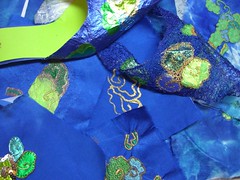
As I am now cycling into work a lot more, I sometimes have to shove my laptop into a pannier. My laptop has recently been replaced with a much faster and swankier one, unfortunately it would not fit into one of the large secondhand waterproof jiffy bags that one or other manager had put into the recycle box. These bag/envelopes made the perfect lightweight, padded and non-bulky laptop protector. Instead I decided to make a laptop sleeve using some spare quilt batting and found some on-sale Cath Kidston oilcloth. I was tempted to call this my laptop mackintosh but didn't want to cause confusion, as it is a "Proper Computer" and nothing to do with apples, mackintoshes or any such i-malarky (don't have a problem with 'em just cannot use one for work). So I went for slicker instead. That is my laptop slicker. As the battery for the laptop sticks out a bit weirdly at the back it isn't as snug as one would necessarily wish for but it does mean I can cart a few important docs. and my trusty notepad home with me, without compromising too much on volume:

As I have been using a series of stylish supermarket carrier bags and vegetable bags to cart my work id, phone and other essentials, I decided to make a little wristlet purse made from the same fabric:
Looks familiar huh? Thats because I used the same pattern and method for the wristlet purse I showed at the beginning of the week. I left out the decoration as I wanted the outside to be all waterproof fabric and didn't want anything too bulky or anything to catch - as it would be hauled in and out of my pannier a fair bit. I ran out of the plain pink fabric for lining so added a little floral touch:

Friday, April 13, 2007

WIP for the last 19 Fridays


I am not procrastinating - I am exploring the possibilities! The weather, cycling, gardening, migraines, flu are all factors to take into consideration. I am working towards my finished metal threadwork piece and know I will need to knuckle down after tomorrows run - if Mr. Happy could do some washing instead of cycle geeking it would help ease things. If he got inspired in the kitchen it would be even better! I don't expect to have the finished shoes by next Thursday's start of term but at least 2 uppers with a reasonable amount of stitching would convince my teacher that I am trying to "crack on" .

Velvet Samples


Velvet Samples

I didn't show you my velvet samples from a month ago did I? They have been up on my flickr account for ages. I enjoyed doing these, although I felt guilty as I was (and I still am!) procrastinating over another project. I think I better post about that later - maybe as a way of taking part in WIP Friday.

From top, left to right:

1. Bleach Sample 6, 2. Bleach Sample 5, 3. Bleach Sample 4, 4. Bleach Sample 3, 5. Bleach Sample 2,
6. Bleach Sample 1, 7. Devore Sample 3, 8. Devore Sample 2, 9. Devore Sample 1, 10. Discharge Sample 4,
11. Discharge Sample 3, 12. Discharge Sample 2, 13. Discharge Paint Sample 3, 14. Emboss Print Sample 2, 15. Embossing Sample 2,
16. Emboss Printing Sample 1, 17. Printed Sample 1, 18. Embossing Sample 1, 19. Discharge Paint Sample 2, 20. Discharge Paint Sample 1,
21. Discharge Dye Sample 2, 22. Discharge Dye Sample 1, 23. Discharge Sample 1, 24. Bonded Sample 4, 25. Bonded Sample 3

Saturday, April 07, 2007

A bag for pens


Or rather, a pencil case. This is another altered project from Celine Dupuy's book. I saw the project picture and had recently inherited some similar green cotton velvet. I liked the idea of the contrast colour zip and a funky lining. The shape was changed a little to give the pencil case a base by sewing across the corners, which I mirrored at the top of the case.

Plenty of room for my favorite pens and stuff:

Friday, April 06, 2007

Bringing out the kitsch pegbag

The basket I was keeping my pegs in was getting rather tatty and whilst I was up in the loft fabric stash inspecting I found a child sized coat hanger. I also found a remnant of some IKEA fabric and quickly cut this out on my mat and found a heart template from my heart and flower sampler throw (boy, that throw has had a lot of involvement with the bags this week).

A lack of red bias binding stopped play but was resumed once I had popped to the shops and cooked a fine prawn korma.

Thursday, April 05, 2007

Last of the metal thread work


This is the first mini project I completed before the velvet one I showed the other day. These are more my kind of colours, I am using this as a jumping point for my first metal thread piece, so I based this on this design. The silk backing fabric is silk dupion dyed with Quick Color dyes. I started this just after Christmas, I spent an indecent amount of time finishing it off - constructing it, trimming it and attaching a suitably "bling" handle. The bag strap is made from a kumihimo cord which I created from some metallic elastic cord in lime green, turquoise and gold, I also added in some dark blue dyed raw silk cord. The foils I used for some of the work were obtained from some Christmas chocolates, on enquiry I found out they were from M&S. M&S Chocolates are great - not only are they of a high (and rather delicious) quality they also refrain from putting their brand all over the foil. The result: beautiful foils to use in projects and a fatter than necessary stitcher. I need to think of a project involving red foils - according to my friend C - M&S do lovely cherry covered chocolates.

Wednesday, April 04, 2007

Inspired by Rive Gauche Holdall


I have been purchasing a few naughty books recently. No! not that kind - the kind of book I am talking about are "books-which-are-not-strictly-necessary-but-couldn't-resist-anyway-even-though-they-have-nothing -to-do-with-my-course".

So I got this lovely book by Celine Dupuy:


and when perusing the projects (okay you caught me - reading it when I should have been doing something more constructive) one bag caught my eye:


Then, when I was next in my local sewing shop, I found some similar handles which were wider. I had some fabric in mind to make up the bag but found I didn't have quite enough to make it in the same proportions - so it is a bit longer and not as ruched. The lining fabric is the same for my wristlet bag (I have a lot of leftover throw backing), but this time it shows as it also provides the channels for the brass rods which attach the bag to the handles.

I made it a little taller and it only took a few hours, despite the journey into the loft to raid the fabric stash (oh how I hate that bl***y awkward ladder). So I now have another bag..... hmm what do I do with it? Cart my stitching about in!


Tuesday, April 03, 2007

Raised work velvet bag


Today's bag is a "mini-project" sample for raised work techniques. I have already outlined the design steps in a previous post and this is the result.

For the background we were encouraged to use velvet and I chose a piece I space dyed in our recent dye workshop. Though it was tempting to do this in a green velvet, I decided to veer away from my usual colour choices. I patterned the background with some rather bright painted fusible web. I then couched some space dyed viscose chenille thread and then set about stitching over the fusible web pattern. I chose a random selection of bullion knots, detached button hole stitch, french knots, padded satin stitch, raised cup stitch and woven picots. I cut out the bag pieces after developing the pattern using these instructions for using a curved purse frame. The bag lining was some viscose satin that I space dyed at the same time as the velvet. I wish I had used the heavy sewing interfacing that I used for yesterday's bag as the bag is a bit too floppy (it is stuffed in the picture), but I was worried that the top of the bag would be too bulky to glue into the frame. Ah! isn't hindsight a wonderful thing?

The bag was then edged with some free machine lace edging. This was done separately on soluble film independently to the bag as I didn't want to have to get the bag wet. I had done some edgings integrating the velvet and the soluble fabric, but it is the devil to rinse out thoroughly (and leaves the velvet a little rough and stiff).


So I hand stitched the lacy edging to the bag after a thorough rinsing. Unfortunately the photo does not clearly show the edging but its there (one of the requirements of the sample).

I finished off the bag by attaching a beaded wrist handle. I hand't done any beading for a while but I hoiked out some tigertail and rocaille beads from my stash and treated myself to some glass beads from the hobby-and-craft-shop-I-love-to-loathe. A few blobs of glue, some calotte crimps and a jump ring completed the handle which was attached to the loop on the purse frame.

Monday, April 02, 2007

Time for some sewing

I have another week of leave this week. Main difference is that M doesn't so I can devote my time for stitching. I haven't exactly had a drought of sewing but I now need to knuckle down and produce some serious output for college. For one reason or another I have been partaking in a spot of bag making some for college and some for purely indulgement. So for this week only I think I will be showing a bag a day for the next week.

First up is this little number which is from a project in this month's Sewing World. The lady who designed the project is the owner of the online bag shop and blog u-handbag.com, a site I have become rather partial to as a one stop shop for the bits and pieces of bag hardware I have needed recently and Amy Butler patterns (come back soon for the results).


As I wanted to try the project out before using some pricey fabric I have in store, I decided to use some fabric in my stash. I found some samples my friend G picked up for me in IKEA when I was musing on what to do for curtains in our bedroom last year, there was just enough to make this wristlet bag. The lining was some left over fabric from the sample throw I made last year. All I had to do was get myself a matching zip. The heavy weight sew-in interfacing is the business and the leftovers will be used in future projects. The bag is large enough to take my phone, purse, ipod and a few other essentials so a version will be devised for my cycle to work days.

Sunday, April 01, 2007

Melting moments

One of the last metal thread samples that I got done on Friday. Three layers of synthetic fabric with free machine embroidery in metallic thread. I made sure that my metallic thread was truly metallic, some are just polyester and nylon. I used a tulip motif which I repeated and when I had covered a large enough area I directed a heat tool (stampers use them for embossing powder). The polyester sheer fabrics melted and distressed and I was pleased with the way the two pinks and green fabrics melted at different rates. Couldn't decide which side is really the "right" side. The top one (bad photo) is what I am going with.

Related Posts Plugin for WordPress, Blogger...